Mac users have a few different options when it comes to compressing video files. Here’s a step-by-step guide on how to do it using the QuickTime Player, which is already installed on all Mac computers.
How does video compression work?
Video compression is a process whereby a video file is reduced in size without compromising quality. This is done by removing redundant data from the file, which can include things like duplicate frames or unused bits of audio. The result is a smaller file that takes up less space on your hard drive or other storage device and can be transferred and played back more easily.
There are various video compression algorithms available, but the most common one used on Mac computers is H.264. This codec is able to achieve excellent quality at relatively low bitrates, making it ideal for compressing videos for storage or sharing online.
To compress a video using H.264, you can use the built-in QuickTime Player application that comes with every Mac. Simply open up the video file you want to compress, go to File > Export As…, and choose H.264 as the export format. You can set the desired bitrate and other parameters before saving the compressed file.
There are also numerous third-party video compression apps available for Mac, some of which offer more features and control than QuickTime Player. If you need to compress videos on a regular basis, or want more control over the process, one of these apps may
How to reduce the video file size
When you have a video that you want to share with others, you may want to compress the file so that it takes up less space. This can be especially helpful if you’re sending the video via email or another service that has to file size limits.
There are a few different ways to compress a video on Mac, and which one you use will depend on the file format of your original video and the desired quality of the compressed video.
If you have a video in MP4 format, you can use the built-in QuickTime Player to compress it. Simply open the video in QuickTime Player and choose File > Export As. In the dialog that appears, select Movie to MPEG-4 and clicks Options. In the next dialog, you can choose the desired quality of the compressed video by adjusting the settings under Video Settings. Once you’re happy with your settings, click OK and then Save.
If your original video is in a different format, such as AVI or MOV, you can use third-party software like HandBrake to convert and compress it. With HandBrake, you can choose from a variety of preset options or customize the settings to get exactly the results you want.
Why Reduce Video File Size
There are many reasons why you might want to compress a video on your Mac. Maybe you need to free up some space on your hard drive, or maybe you want to send a video file to someone but don’t want it to be too large. Whatever the reason, compressing a video is a pretty easy process.
Here are a few tips on how to compress a video on your Mac:
1. Reduce the resolution of the video. This will make the file smaller without reducing the quality too much.
2. Reduce the frame rate. This will also make the file smaller without reducing the quality too much.
3. Use a compression codec that is designed for small file sizes, such as MPEG-4 or H.264.
4. Use a program like iMovie or QuickTime Player Pro to export the video at a lower bit rate.
5. Use a service like a Handbrake to compress the video even further.
With these tips, you should be able to compress any video on your Mac without too much trouble.
Best way to compress a video without losing quality on Mac
There are a few ways that you can compress a video on your Mac without losing quality. One way is to use the QuickTime Player. With QuickTime Player, you can select the option to reduce file size which will lower the quality of the video but keep the resolution the same.
Another way to compress a video on Mac is to use iMovie. iMovie has a number of options for compressing videos without losing quality. You can select from a number of different preset options or customize the settings yourself.
Finally, you can use third-party software to compress your videos. Several different software programs are available, both paid and free, that can help you compress your videos without losing quality.
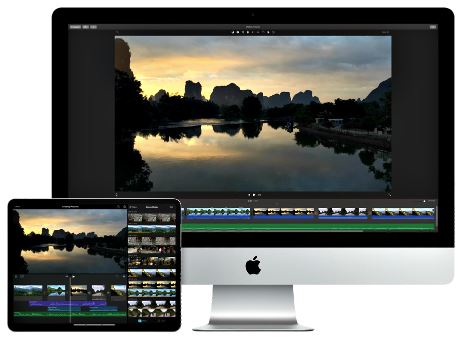
Reduce file size on Mac using iMovie
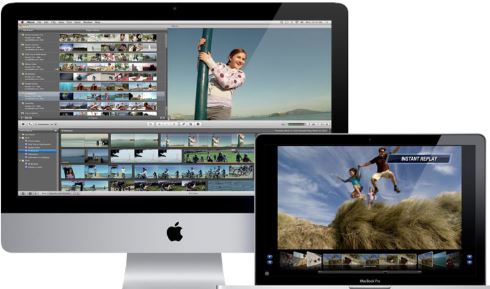
iMovie is a powerful video editing tool that can help you compress your videos on Mac. This guide will show you how to use iMovie to reduce the file size of your videos.
First, open your video in iMovie and click on the Export button in the top-right corner of the window.
In the Export window that appears, select the File > Reduce File Size option.
iMovie will now start compressing your video and saving it as a new file. Depending on the size of your video, this process may take a few minutes.
Once iMovie has finished compressing your video, you can check the file size by right-clicking on it and selecting Get Info. If you’re happy with the new file size, you can delete the original video to save space on your Mac.
Compress video on Mac using QuickTime
QuickTime is a powerful multimedia tool that comes with every Mac. It can be used to compress video files to save space without compromising quality. Here’s how:
Open QuickTime Player and go to File > Open File. Select the video you want to compress.
Click on File in the top menu and select Export As….
In the Export window that pops up, select Movie to QuickTime Movie from the Format drop-down menu.
Click on Options and select one of the preset options from the Settings drop-down menu. These are based on popular video formats and will automatically adjust the compression settings for you.
Finally, click on Save and choose where you want to save the compressed file.
Reducing video file size with free compressors
There are many ways to reduce the file size of a video on a Mac. One way is to use a free video compressor.
There are many different free video compressors available online. Some popular options include Handbrake, MPEG Streamclip, and FFmpeg.
To use a video compressor, first select the video file you want to compress. Then, select the output format and desired file size. Finally, click the “Compress” button to start the compression process.
Reducing the file size of a video can be helpful if you need to save space on your hard drive or if you want to upload the video to a website or social media platform.
How to play compressed videos
If you have a Mac, you can use the QuickTime Player application to play compressed video files. QuickTime Player is pre-installed on all Macs and can be found in the Applications folder.
To play a compressed video file:
1. Double-click the video file to open it in QuickTime Player.
2. Click the Play button in the QuickTime Player window.
The video will begin playing. You can use the controls in QuickTime Player to pause, fast forward, or rewind the video.