In this digital age, privacy has become a significant concern for many individuals. Whether you want to protect the identity of someone in a photo or maintain your own privacy, blurring the face in a photo can be an effective solution.
In this guide, we will explore how to blur the face in a photo using Canva, a popular graphic design tool that offers a range of features for photo editing. With step-by-step instructions and helpful tips, you’ll be able to easily blur faces in your photos and safeguard privacy.
How to Blur the Face in a Photo Using Canva
Step 1: Sign in to Canva and Upload the Photo
To get started, sign in to your Canva account or create one if you haven’t already. Once you’re logged in, navigate to the editor and click on the “Uploads” tab. Select the photo you want to edit by clicking the “Upload an image or video” button. Wait for the photo to upload, and then proceed to the next step.
Step 2: Open the Photo in the Canva Editor
After the photo has been uploaded, click on it to open it in the Canva editor. You’ll see various editing options on the left-hand side of the screen.
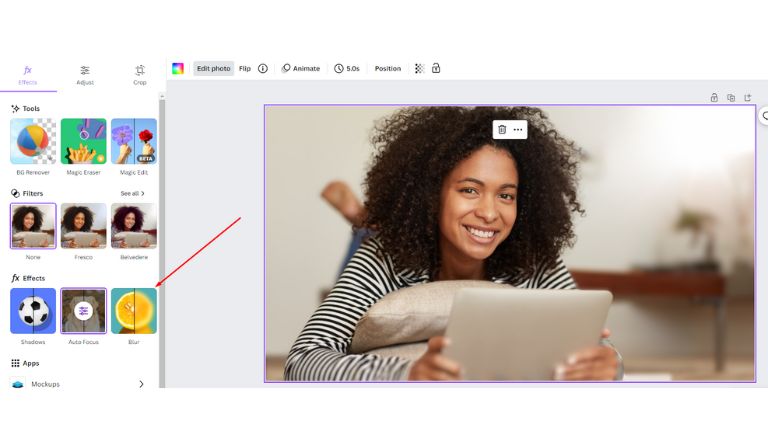
Step 3: Locate the “Effects” Menu
In the editing options panel, find the “Effects” menu. It’s usually represented by an icon that looks like a magic wand. Click on it to access the effects menu.
Step 4: Apply the “Blur” Effect
Within the “Effects” menu, you’ll find a range of effects that can be applied to your photo. Locate the “Blur” effect and click on it. Canva will automatically apply a blur effect to your entire photo.
Step 5: Use the Eraser Tool to Reveal the Face
To reveal the face and remove the blur effect, select the eraser tool from the toolbar. Adjust the brush size according to the size of the face you want to reveal. Carefully erase the blur effect from the areas where the face is located, ensuring that you don’t erase any other important details in the photo.
Step 6: Fine-Tune the Edges
After removing the blur effect, you may notice that the edges around the face are not perfectly smooth. To fine-tune the edges, select the “Brush” tool from the toolbar and choose a small brush size. Use the brush to touch up the edges of the blurred area, making them blend seamlessly with the rest of the photo.
Step 7: Save and Download the Edited Photo
Once you’re satisfied with the result, click on the “Download” button to save the edited photo to your computer or device. You can choose the desired file format and quality before downloading.
Conclusion
Protecting privacy in photos has never been easier thanks to the powerful and user-friendly features offered by Canva. With the step-by-step instructions provided in this guide, you can confidently blur faces in your photos, ensuring the privacy and anonymity of individuals. Whether you’re a professional photographer or an everyday user, Canva’s photo editing capabilities make it a versatile tool for enhancing and safeguarding your images.
So why wait? Sign in to Canva, upload your photo, and start blurring faces today!